Mac: Re-directing iTUNES - no more 'musical chairs'


Re-posted on The Star (Citizen's Blog)
Managing a large cache of iTunes data within the internal hard-drive of my Mac had always been an awkward game of musical chairs, given I had more data than the drive could hold. By musical chairs I mean, when I have finished with a batch of movies, I would take them out of the ‘almost full’ internal drive and import the next ‘unwatched’ batch.
Then I came across a tutorial on ‘Re-directing iTunes to an external’ by Michael Manna of T4 Productions. The guru is crisp, clipped and to the point. End result - I have almost 1000G of Movies, Music, Podcasts and Audio-Books on a Western Digital Studio, firewired to a 500G iMac with 300G free internally.
The thing is, almost no space is taken up by iTunes data on the internal drive itself, save for Coverflows and relevant Metadata; meaning, even without the external connected, you can show off the Coverflows and relevant Metadata of your Movies, Music, Podcasts and Audio-Books, except play them. Wired to the computer, everything plays on iTunes and Front Row, its media presenter, as if they are coming off the internal. Front Row can be likened to iTunes in a tuxedo. It follows and presents iTunes wherever its raw data is pointed at.
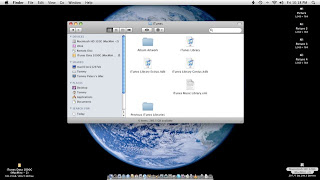
The clips are screenshots of the procedure done at home. Click on them for a larger view. Basically they depict 5 steps to liberating your internal drive. Hope they are helpful. The screencasts show the Library being updated.
Step 1. Erase the intended external drive to Mac OS Journaled on a GUID Partition Table. This step is vital. GUID the external first, mindful that most large externals on shelves are on Windows platforms. The procedure is done via the Partition route in Disk Utility, after which Verify the drive by clicking the 'Microscope' icon on the top-left of the pane.
Step 2. Go to User>Music>iTunes and you will find 6 or 7 folders within. Copy 3 folders; (Album Artwork), (iTunes Music) and (iTunes Music Library.xml) to the intended external drive. The other folders are not relevant. This process may take a while depending on the size of the re-directed data.
Step 3. Go to iTunes>Preferences>Advanced and change the location of iTunes Music folder from the internal to the intended external drive.
Step 4. Go to File>Library and click Consolidate Library. This process consolidates the Library with the intended external drive and takes longer than Step 2.
Step 5. Once consolidation is done, drag the 'iTunes Music' folder to Trash and empty the bin. The final step (of emptying the bin) liberates all space on your internal drive, previously hogged by the iTunes data.
Henceforth, space on your internal is hardly taken up because new content is routed through the iTunes ‘Library’ straight into the external drive.
FireWire, rather than USB, is the preferred connection.
Cheers, Tommy Peters


.jpg)
Comments
Post a Comment